When verification runs from your own connection, a big chunk of addresses come back with no clear answer and everything crawls. A dedicated IP fixes that, and setting one up is far easier than it looks. Every command is ready to copy.
You queue up a 50,000-address list overnight. You come back in the morning and find this: thousands of addresses marked unknown, throughput stuck at a few per second, and worst of all, a handful of real customers flagged as invalid.
The software isn’t the problem. Neither is your list. The problem is the IP address you did the talking from.
What’s actually happening
People assume email verification is some kind of clever guesswork! It isn’t. Your verifier connects directly to the mail server behind that address and asks, in effect, “do you have this mailbox?” It reads the answer and hangs up. No email is ever sent.
The catch is that this conversation happens from your own internet connection, and a home or office IP was never built for it. Three things get in your way:
| The problem | What it does to your results |
|---|---|
| Port 25 is blocked | Most consumer ISPs block it outright. Without it the conversation never starts, and everything comes back unknown. |
| Your IP keeps changing | A dynamic residential IP has no stable name attached to it. Receiving servers treat that as suspicious and either refuse you or answer vaguely. |
| Your IP is shared | You share that address with hundreds of other subscribers. One of them sends spam and you end up behind the same wall. |
Why this kills your speed
When a receiving server doesn’t recognize your IP, it stalls. It greylists you, answers slowly, or caps you at a couple of concurrent connections. Your verifier has no choice but to wait and retry. Multiply those few-second waits by fifty thousand and you’ve lost the whole night.
With a clean, static IP, the same list runs with far more parallel connections and far less waiting.
And why it wrecks your accuracy
This matters more than the speed. When your verifier can’t get a clear answer, it has to guess, and a wrong guess costs you either way: you drop a real customer from your list, or you keep a dead address that pushes your bounce rate up.
And a high bounce rate means your sending provider starts throttling you. One sloppy verification run comes back to haunt you months later as campaigns that never arrive.
The fix
You rent a small server and run a SOCKS5 proxy on it. Your verifier stays on your own machine, but from then on it speaks with that server’s IP: static, dedicated, port 25 open, properly named.
A few euros a month, set up once, and you’re done with it. Let’s build it.
Picking a provider
We’ll use Hetzner (console.hetzner.com) here because it’s cheap and the panel isn’t cluttered. But don’t get attached to it: any Linux VPS will do the job. DigitalOcean, Vultr, Linode, Contabo, OVH, or whoever you already have an account with.
Everything happens on Ubuntu and has nothing to do with the provider. Only the button names change. Where we say “click Add Server,” yours might say Create Droplet or Deploy Instance. Same thing.
There is one real difference worth taking seriously though: port 25. The entire verification process depends on it. Spammers abused that port for years, so most cloud providers block it on new accounts and only open it on request. Some leave it open from day one.
You’ll need three things to start: an email address, an international payment method, and a domain. The domain isn’t optional — you’ll see why at the reverse DNS step.
Creating the server
First, create an account with your provider and log in. On Hetzner that’s console.hetzner.com. From your dashboard, create a new project (call it proxy) and add a server inside it.
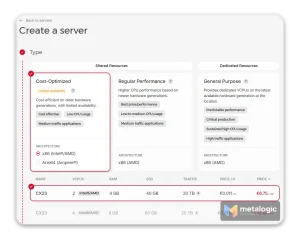
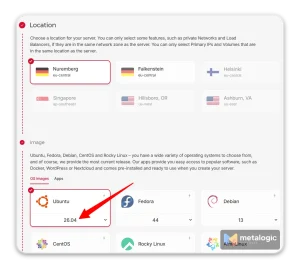
- Location: Anywhere in Europe; Helsinki or Falkenstein
- Image: Ubuntu 26.04
- Size: The smallest option; on Hetzner that’s CX22
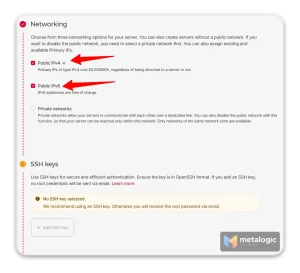
- Networking: Both IPv4 and IPv6 enabled
- SSH keys: Leave empty, we’re logging in with a password
- Name: verify-proxy or anything you want
Hit create and give it about 30 seconds.
Where’s the password?
Since you didn’t attach an SSH key, the provider emails you a root password. Keep that email open, you’ll need it in a minute. If it never arrives, the server panel has a Reset root password button that shows you a fresh one right in the browser.
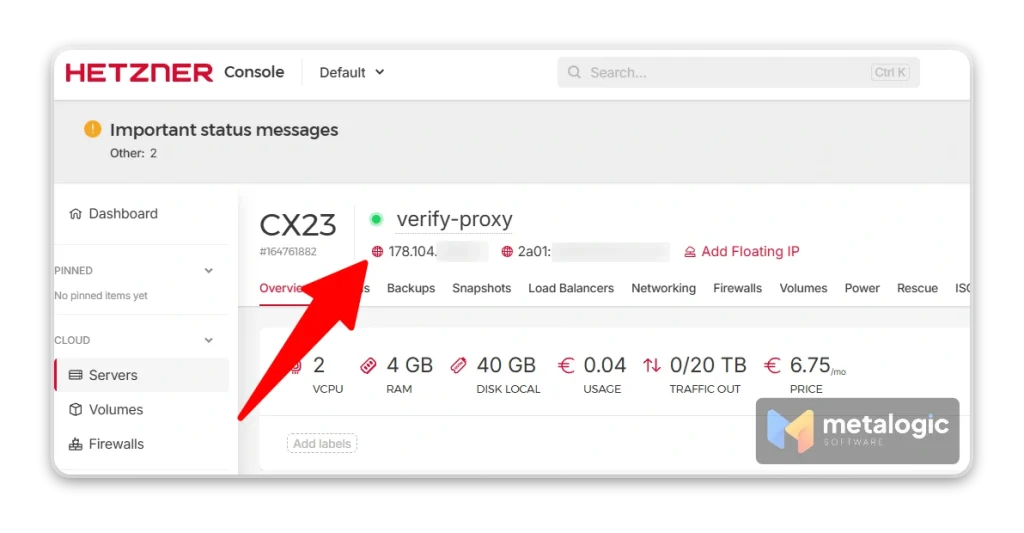
Now click the server name. At the top you’ll see a number like 89.167.39.172. That’s your server’s address. Write it down. Anywhere this guide says SERVER_IP, put that number in.
Setting up reverse DNS
You’ll be tempted to skip this one. Don’t. Before anything else, mail servers check whether the IP talking to them has a name. No name means suspicious, and suspicious means the connection gets dropped.
Most of the errors you’ll hit later during verification trace back to exactly this step.
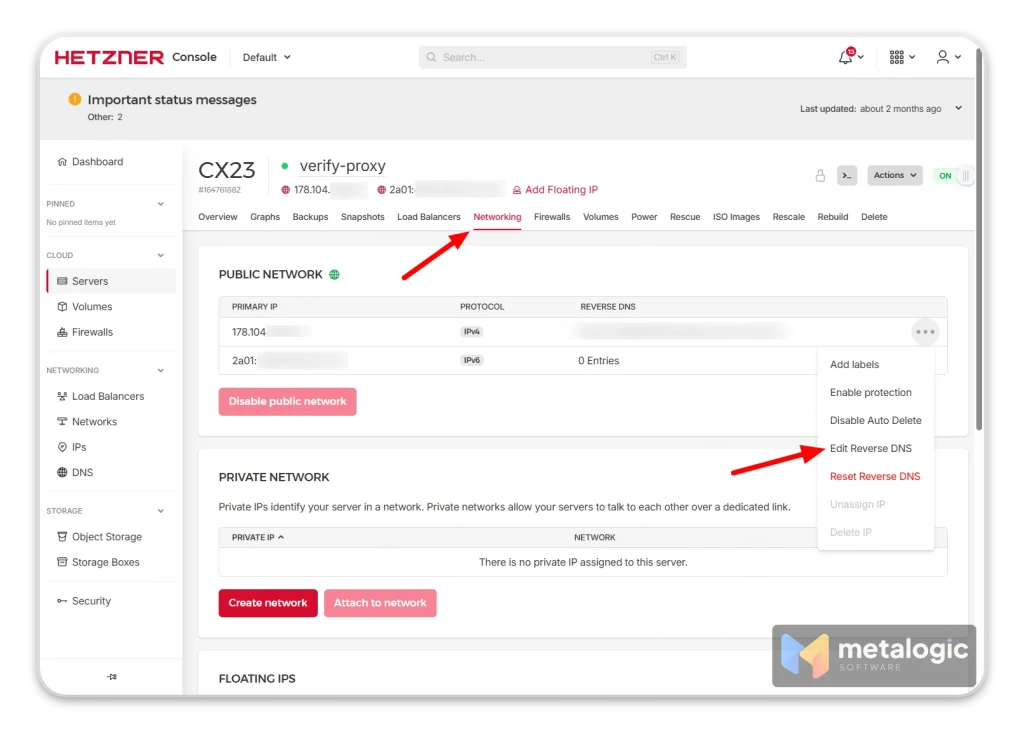
- Open the Networking tab on your server.
- Next to the IPv4 address, choose Edit Reverse DNS.
- Enter
mx-probe.yourdomain.com(your own domain). - Do the same for the IPv6 address.
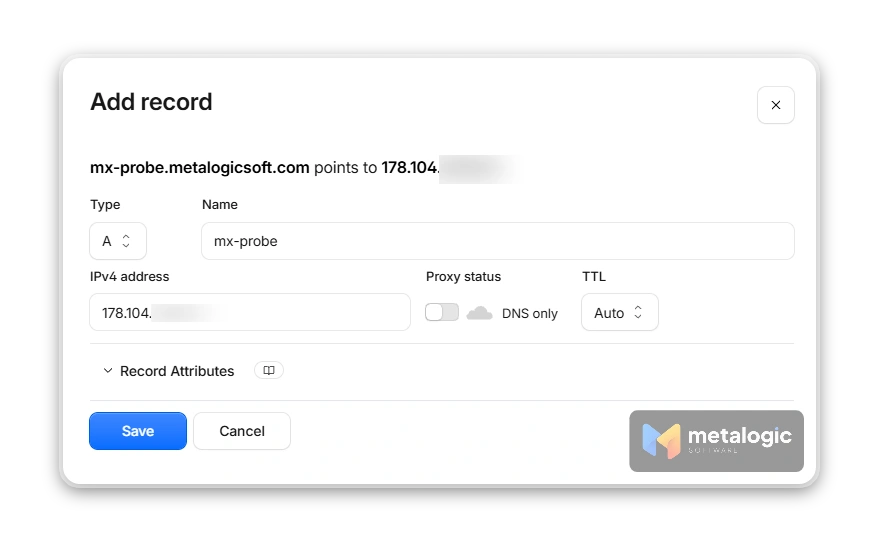
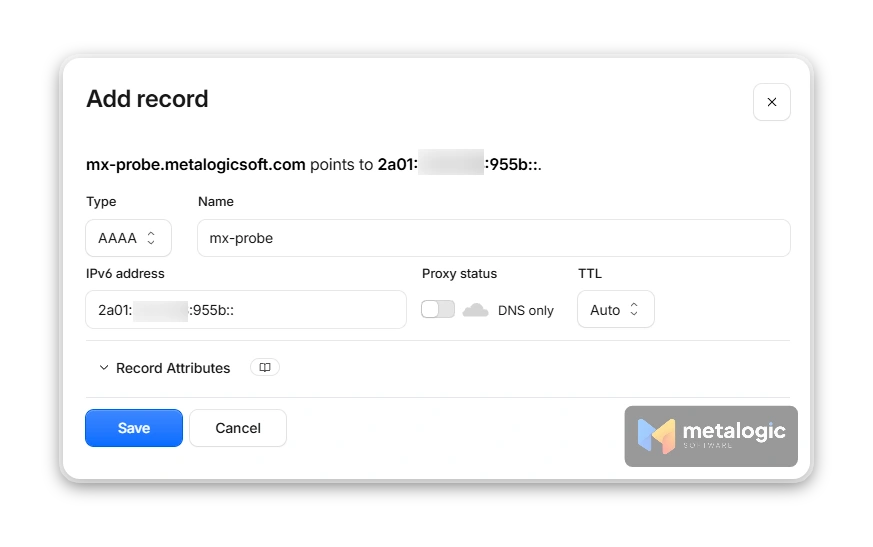
Then create two records in your DNS panel:
| Type | Name | Value |
|---|---|---|
| A | mx-probe | Your server’s IPv4 address |
| AAAA | mx-probe | Your server’s IPv6 address |
On Cloudflare? Turn the cloud off
Every Cloudflare record has a cloud icon next to it. If it’s orange, Cloudflare answers with its own IP instead of your server’s, and this entire step becomes useless. Click the cloud until it turns grey (DNS only). Do it for both the A and AAAA records.
A recorde (for IPv4):
AAAA recorde (for IPv6):
Confirm it actually worked
There are two halves to this, and both have to be right and agree with each other. You don’t need to log into the server; a free online tool shows you both.
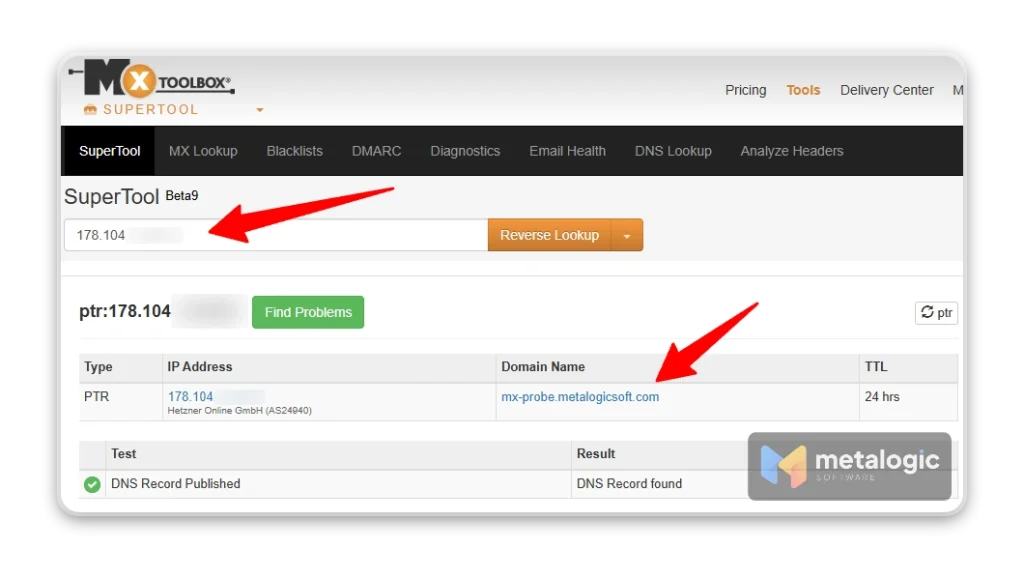
First half: what name does the IP have?
- Go to mxtoolbox.com/ReverseLookup.aspx.
- Paste your server’s IP and hit Reverse Lookup.
- The result should show
mx-probe.yourdomain.com.
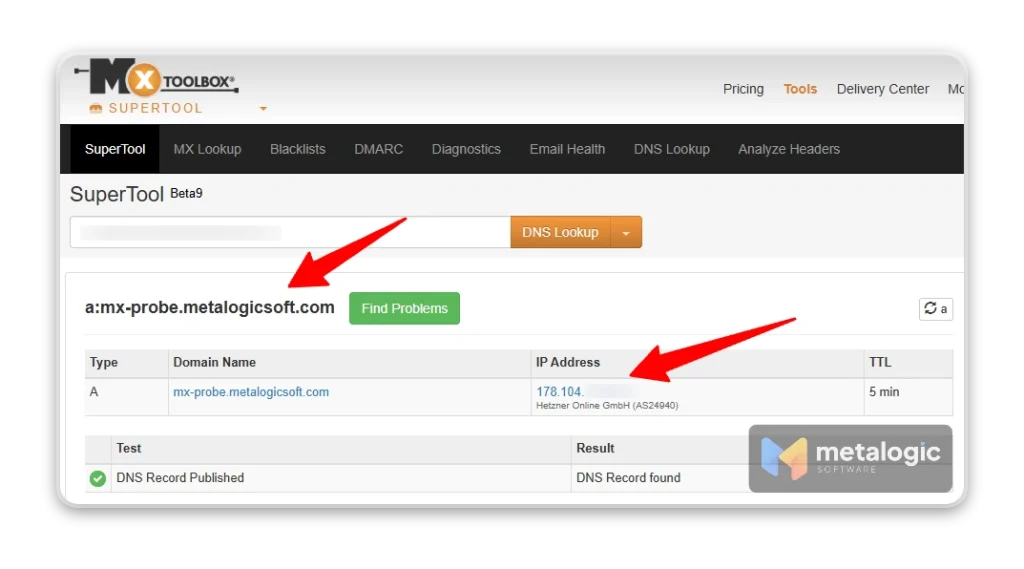
Second half: where does that name point back to?
- Switch to the DNS Lookup tool on the same site.
- This time enter
mx-probe.yourdomain.comand search. - It should return your server’s IP, exactly.
If the second lookup shows a different address, or something like 104.21.x.x, you’ve still got a problem. It’s almost always that orange Cloudflare cloud.
Nothing found? Give it a minute
DNS changes aren’t instant. After saving your records it takes anywhere from a few minutes to half an hour before they’re visible everywhere. If the first lookup comes back empty, try again in ten minutes.
Your first connection
This is the part that scares most people off. It shouldn’t. The tool is already installed on all three operating systems and the command is identical everywhere.
- macOS: hit
Command + Space, type Terminal, press Enter. - Windows: open the Start menu, type PowerShell, open it.
- Linux: open your Terminal app.
Then type this, swapping in your server’s number:
ssh root@SERVER_IPThe first time it asks whether you’re sure. Type yes and press Enter.
Now it wants the password. The one from the email. Copy it and paste it in.
Nothing appears while you type the password
No asterisks, no dots, like the keyboard isn’t working at all. That’s deliberate. Paste or type it and press Enter anyway.
On this first login the server forces you to change the password. It asks for the current one again, then the new one twice. Save the new password somewhere safe right away, because it won’t show it to you again.
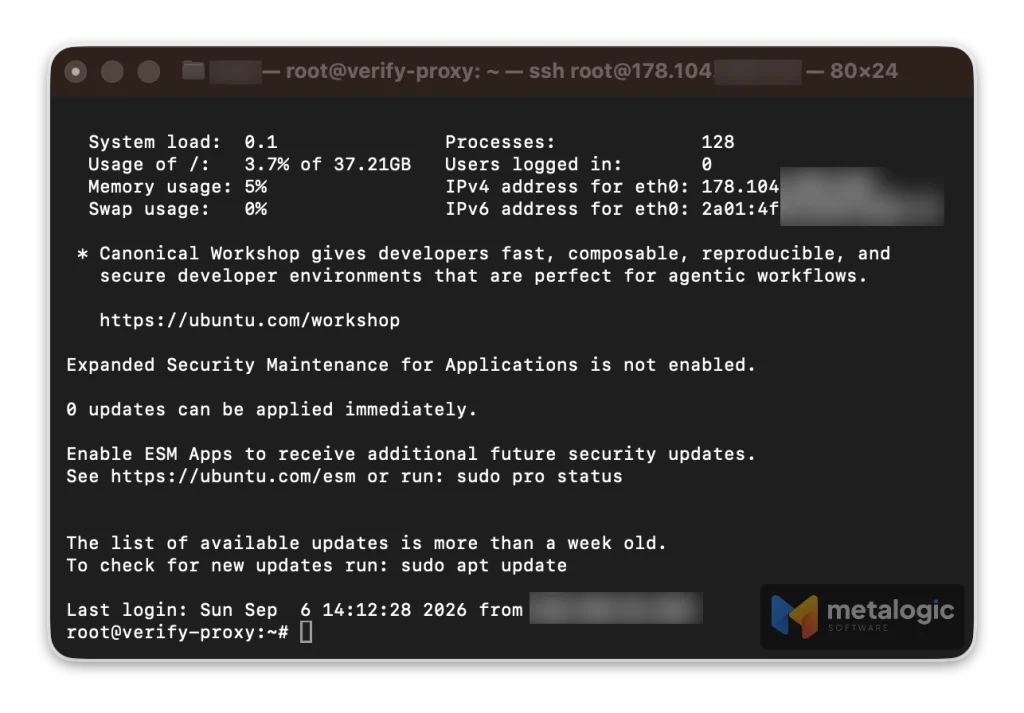
If your prompt looks like this, congratulations, you’re in:
root@verify-proxy:~#Take that root password seriously
Your server is visible on the open internet from the moment it boots, and bots start trying common passwords within hours. That’s not an exaggeration; you can watch it happen in your own auth log. So make the password you set here long and genuinely unguessable.
Installing the proxy
In most tutorials this is the longest section: install the package, edit the config file, hunt down your network interface name, create a user, start the service. Happily, you don’t have to do any of it by hand.
There’s an open-source script that handles all of it with Dante and runs its own test at the end. On the server, run these two lines:
wget https://raw.githubusercontent.com/saaiful/socks5/main/socks5.sh
sudo bash socks5.shIt asks you three things
That’s it. The script runs and only asks you for three things:
| Prompt | What to enter |
|---|---|
| Proxy port | Just press Enter to keep 1080 |
| Username | Whatever you like, e.g. proxyuser |
| Password | A long, strong one you come up with |
Nothing shows up on screen while you type the password. Same as before, that’s normal.
Keep special characters out of the password
Make it long, at least 20 characters, but stick to letters and numbers. Avoid @, :, /, # and %.
Why? Because that password later goes inside a connection URL, where those characters have special meaning. A password with an @ in it splits the URL in half and you’ll spend hours chasing a bug that doesn’t exist. A long simple password is stronger than a short cryptic one anyway.
When it finishes, the script tests the proxy itself and prints your server’s IP details. If you see SOCKS5 proxy test successful, your SOCKS5 proxy server is live. That was the whole thing.
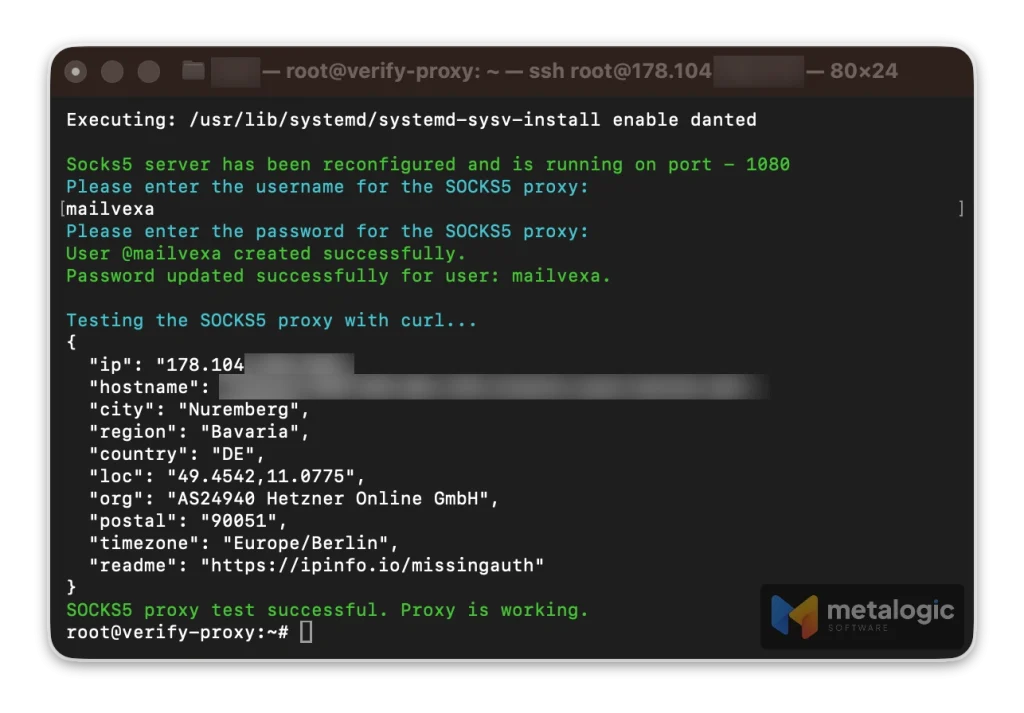
Changing something later
Forgot the password? Want a different port? Just run the same script again:
sudo bash socks5.shThis time you get a menu:
| Option | What it does |
|---|---|
| 1 — Reconfigure | Change the port |
| 2 — Add a new user | Create a new user or change an existing password |
| 3 — Uninstall | Remove the proxy completely |
| 4 — Exit | Quit without changing anything |
Testing from your own machine
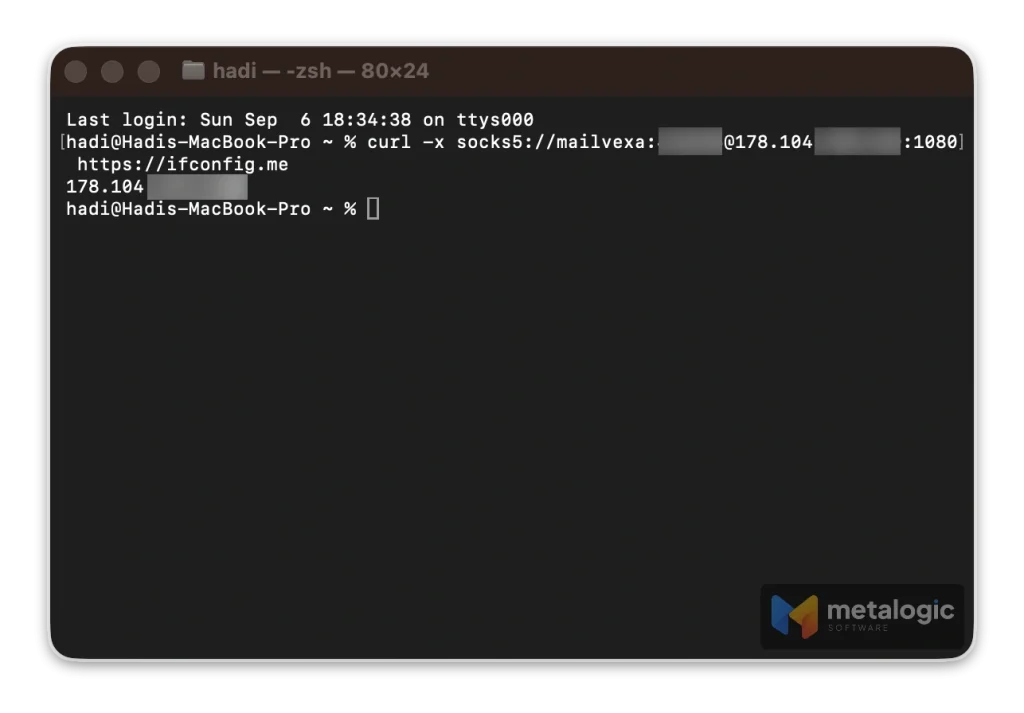
The script tested the proxy from inside the server, which is good but not enough. What actually matters is whether it answers from the outside. Open a terminal on your own computer:
curl -x socks5://USERNAME:PASSWORD@SERVER_IP:1080 https://ifconfig.meIt should return your server’s address, not yours. Once you see that, the proxy is ready. From this point on, anything routed through it leaves with a clean IP.

Pointing your verifier at it
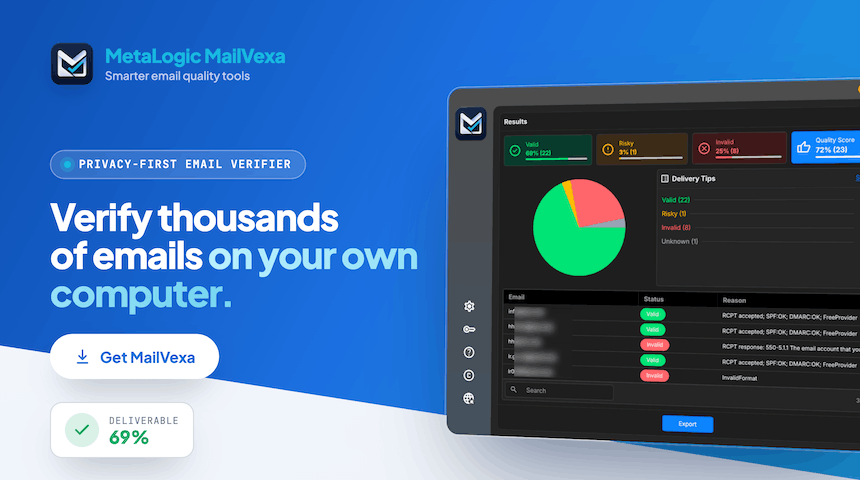
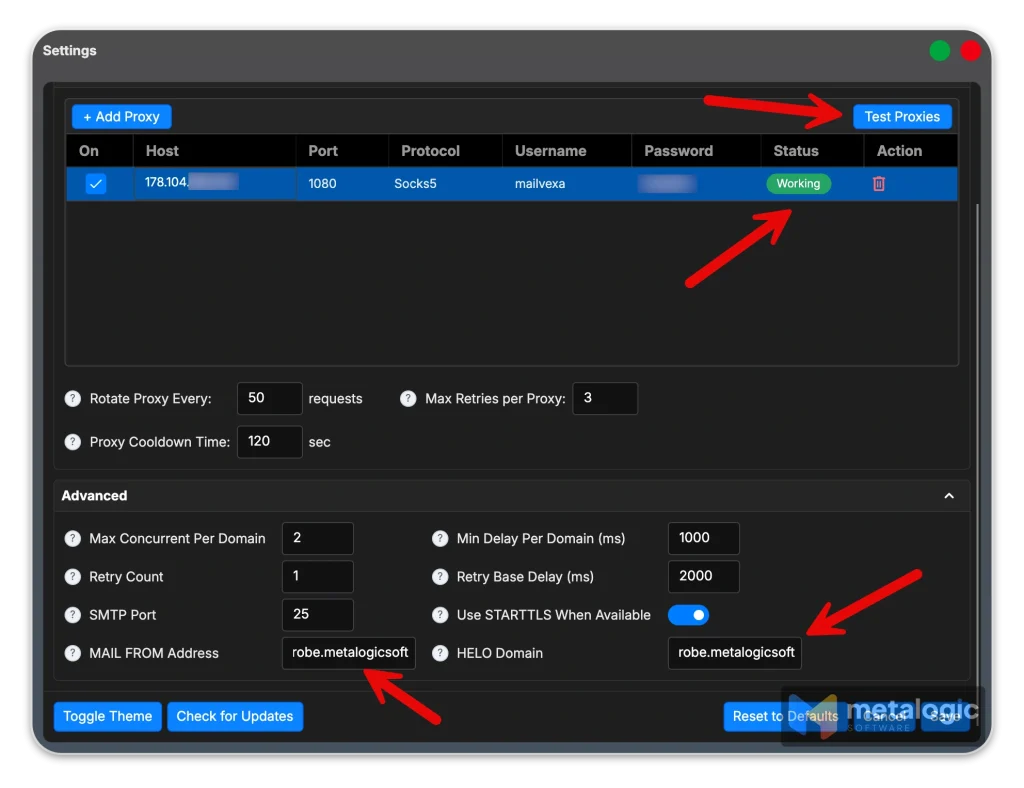
The hard part is done. Now you just tell your verifier to use the proxy. In MailVexa, open Settings and find the Proxy section:
| Field | Value |
|---|---|
| Type | SOCKS5 |
| Host | Your server’s address |
| Port | 1080 |
| Username | The username you gave the script |
| Password | The password you gave the script |
Hit Test Connection, then Save. Done.
Two more fields people skip
There are two more fields on that same screen that most people breeze past, and then wonder why verification fails for certain domains. These control how your verifier introduces itself when it talks to the destination server.
Leave them blank or fill them in wrong and Yahoo and Outlook will drop you at hello.
| Field | What goes in it | Example |
|---|---|---|
| HELO Domain | Exactly the name you set for reverse DNS in section | mx-probe.yourdomain.com |
| MAIL FROM Address | A full email address on that same subdomain | [email protected] |
The most common mistake: a domain in MAIL FROM
This field wants an email address, not a domain. Put mx-probe.yourdomain.com in there, with no @, and a lot of servers will reject it as malformed. It needs to look like [email protected].
And the reverse applies to HELO: that one takes a domain, not an email address. Since the two fields sit right next to each other, swapping them is easy to do.
HELO has to match your reverse DNS. The receiving server compares the name you announce against the PTR record of your IP. If section 3 says mx-probe.yourdomain.com, put exactly that here. Not your bare domain, not some other subdomain.
Two more DNS records on that subdomain
Why the subdomain rather than your main domain? Because it keeps your verification reputation separate from your business email. If this IP ever runs into trouble, your main domain stays untouched.
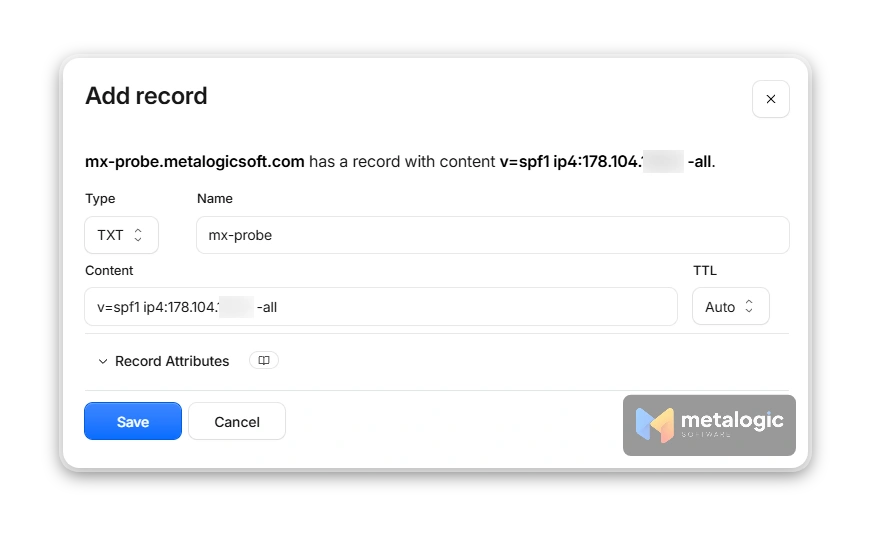
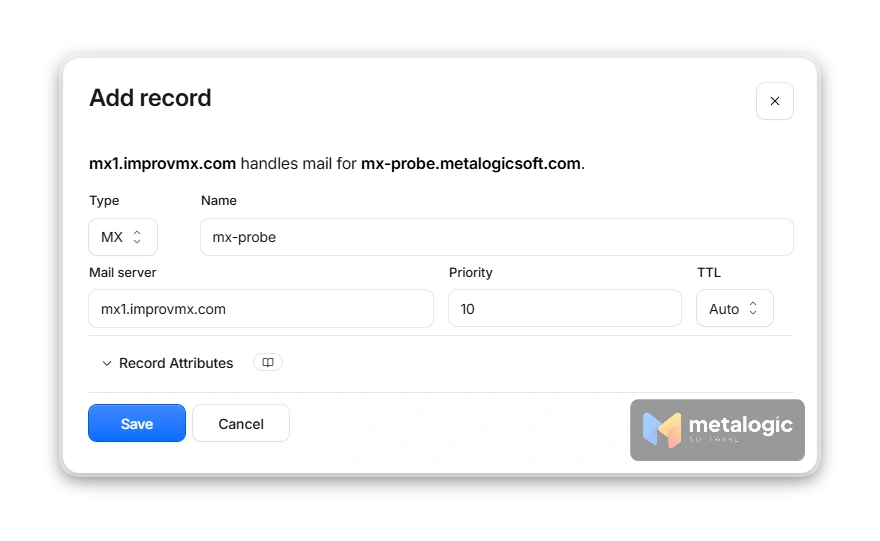
Add these two records:
| Type | Name | Value |
|---|---|---|
| TXT | mx-probe | v=spf1 ip4:SERVER_IP -all |
| MX | mx-probe | Priority 10, with the Mail server field set to whatever your main domain’s MX record uses |
What goes in the “Mail server” field?
DNS panels (Cloudflare included) ask for a Mail server value on MX records, on top of the name and priority. Don’t invent it.
Find your main domain’s existing MX record on the same DNS page and copy its value verbatim. Depending on your email provider it’ll look like smtp.google.com, mx.zoho.com, or mail.yourdomain.com.
If you don’t run email on the domain at all, add two records pointing at mx1.improvmx.com (priority 10) and mx2.improvmx.com (priority 20).
This value has to be a hostname, never an IP address.
Is the MX record really necessary?
Yes. Some receiving servers run a sender callout before accepting your connection, checking whether mail could actually be delivered to your MAIL FROM address. With no MX on the subdomain, that check lands on your proxy server, where nothing is listening for mail, and it fails.
If you don’t run email on your domain at all, you can point the MX at a free forwarding service like ImprovMX just to catch bounces.
Put the SPF record on the subdomain, not the root
If your main domain handles business email and you add an SPF record with -all to it, you’ll break your normal sending. The record above lives only on mx-probe and leaves the root domain alone.
When something breaks
If you’re stuck, odds are good your problem is in this table. These are the ones almost everybody runs into:
| Symptom | What to do |
|---|---|
| It says the password is wrong | Switch your keyboard layout to English and try again. Still no luck, grab a fresh one with Reset root password. |
| Nothing appears when I type the password | Normal. It’s hidden on purpose. Type it all and press Enter. |
Script says Failed to start | Find out why: journalctl -u danted -n 20 --no-pager |
Connection refused | The service is down. Check it: systemctl status danted |
Connection timed out | Something’s blocking the port. If you created a firewall in your provider’s panel, open 1080 in it. |
| Username or password rejected | Run the script again and pick option 2 to set a new password. |
| curl returns my own IP | Traffic isn’t going through the proxy. Check the command for typos. |
Forward-confirmed reverse DNS failed | Your A record is Proxied in Cloudflare (orange cloud). Set it to grey and wait a few minutes. |
MAIL FROM rejected | Put a full address with an @ in that field, not a domain. See section “Pointing your verifier at it”. |
| Provider blocked port 1080 | Run the script again, option 1, and pick a different port. |
And if you want to watch what’s happening live:
tail -f /var/log/danted.logEvery connection adds a line. If nothing appears while you’re testing, the request never reached the server at all and the problem is on your end. Press Control + C to quit.
Maintenance
This server needs almost nothing. Once a month, these two lines are enough:
apt update && apt upgrade -y
rebootYour proxy is ready. Now go clean up that list.
MailVexa verifies your email list on your own machine, without uploading your contacts to anyone’s cloud. Windows and macOS, one-time purchase, no monthly subscription.